
Take the Cold Plunge and set up your at-home Ice Bath with an Ice Barrel and Water Chiller.
DIY Ice Bath Parts List:
(click to buy parts now)
If you’re looking for a way to ice down your muscles after a hard workout, you may be wondering how to set up an ice bath at home. It can be tricky to get the temperature just right, but with this guide, you’ll be able to do it in no time! An ice bath, cold plunge, or ice barrel may help reduce inflammation and speed up your healing and fitness recovery process. With this DIY ice bath guide, you’ll be able to set up an ice barrel at home in no time. So if you’re looking for a way to speed up your recovery time, give it a try. Your muscles will thank you!
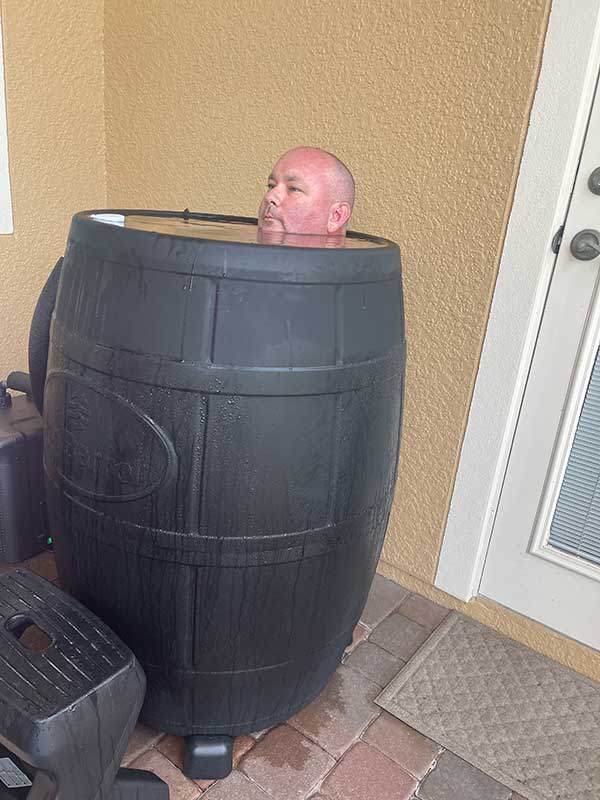
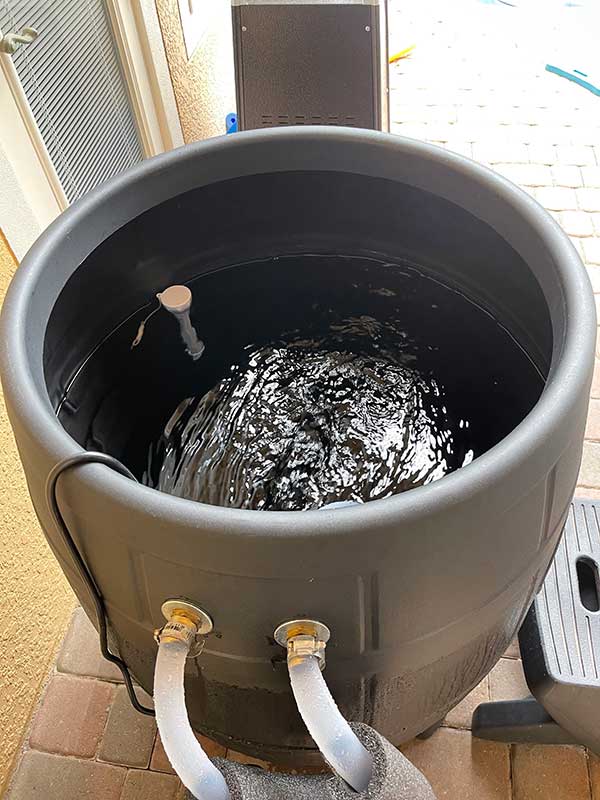
What our DIY Ice Barrel Bath looks like:

Note: after our initial setup with the 1/2-inch hose (that just runs over the top of the ice barrel), we updated our setup to 3/4-inch hose to get more water flow and chill the water more efficiently. This is a slightly more advanced setup that includes fittings to attach the hose to the ice barrel.
Here’s what you’ll need to set up an ice bath at home:
First, you’ll need a container that can hold at least 70 to 100 gallons of water. We recommend using a storage bin, tub, or ice barrel like this one.
Next, you’ll need to fill your container with water. You’ll want to fill the ice barrel about 3/4 to start (when you get in the water level will rise and may overflow a little bit).
Finally, you’ll want to hook up a water chiller and small pump to lower the water temperature in the ice barrel to between 50- and 60-degrees Fahrenheit. We prefer this water chiller paired with this pump. The chiller and pump can be connected with a 1/2 inch hose.
You can add a pool thermometer, but the water chiller will monitor the temperature with a digital readout, so a thermometer is not necessary. The water chiller can be set to hold the temperature within 1 or 2 degrees of your target temperature.
The water pump sits at the bottom of the ice barrel, and the 1/2-inch hose runs from the pump to the water chiller, then back into the ice barrel.
Depending on the ambient air temperature, the initial water cool down period can vary. We set this up in a tropical climate with an ambient temperature of 85- to 90-degrees and waited overnight for the perfect temperature to cold plunge. Once the target temperature was reached (for us that’s 50-degrees) the temperature stays low with little effort from the water chiller.
Safety note: always turn-off and unplug the pump and water chiller before getting in the ice barrel.
You now have a DIY ice bath at home that will keep the perfect temperature 24/7!

